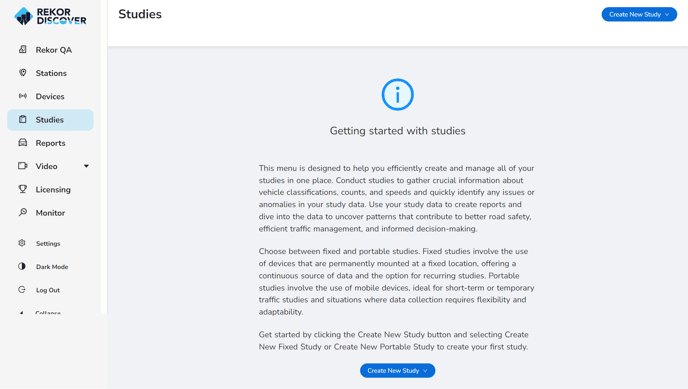
Conduct studies to gather crucial information about vehicle classifications, counts, and speeds and quickly identify any issues or anomalies in the study data. Use the study data to create reports and dive into the data to uncover patterns that contribute to better road safety, efficient traffic management, and informed decision-making.
Portable studies involve the use of mobile devices, ideal for short-term or temporary traffic studies and situations where data collection requires flexibility and adaptability.
Get started by clicking the Create New Study button and selecting Create New Portable Study to create the first study.
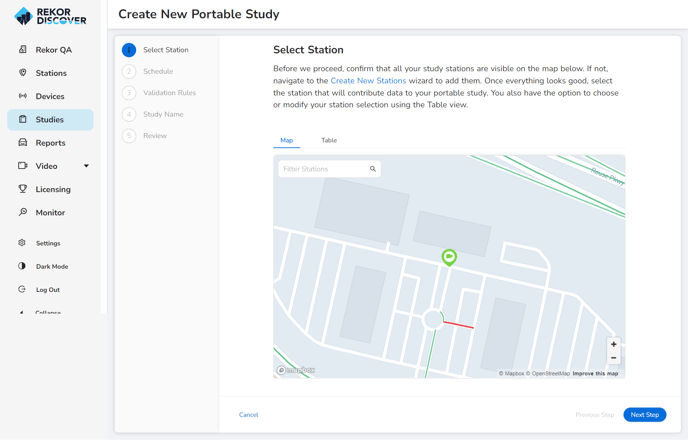
Select Station
Confirm that all the study stations are visible on the map below. If not, navigate to the Create New Stations wizard to add them. Once everything looks good, select the station that will contribute data to the portable study. Choose or modify the station selection using the Map or Table view. Click Next Step.
Schedule
Set up the study for data that has either already been collected or is currently underway. Customize the start date and time and the number of days to run the study to suit the specific study requirements.
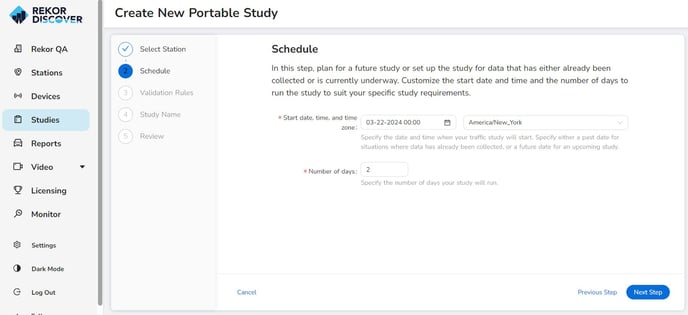
- Start date, time and time zone: Specify the date and time when your traffic study will start. Specify either a past date for situations where data has already been collected, or a future date for an upcoming study.
- Number of days: Specify the number of days the study will run.
- Click Next Step.
Validation Rules
Define the criteria for validation rules to ensure the accuracy and reliability of the study data. These rules will assist in identifying anomalies and detecting issues within the dataset. There are included sensible default values as a starting point to customize and meet the specific needs of the study. Select the criteria that will be used in this study. Definitions are provided below.
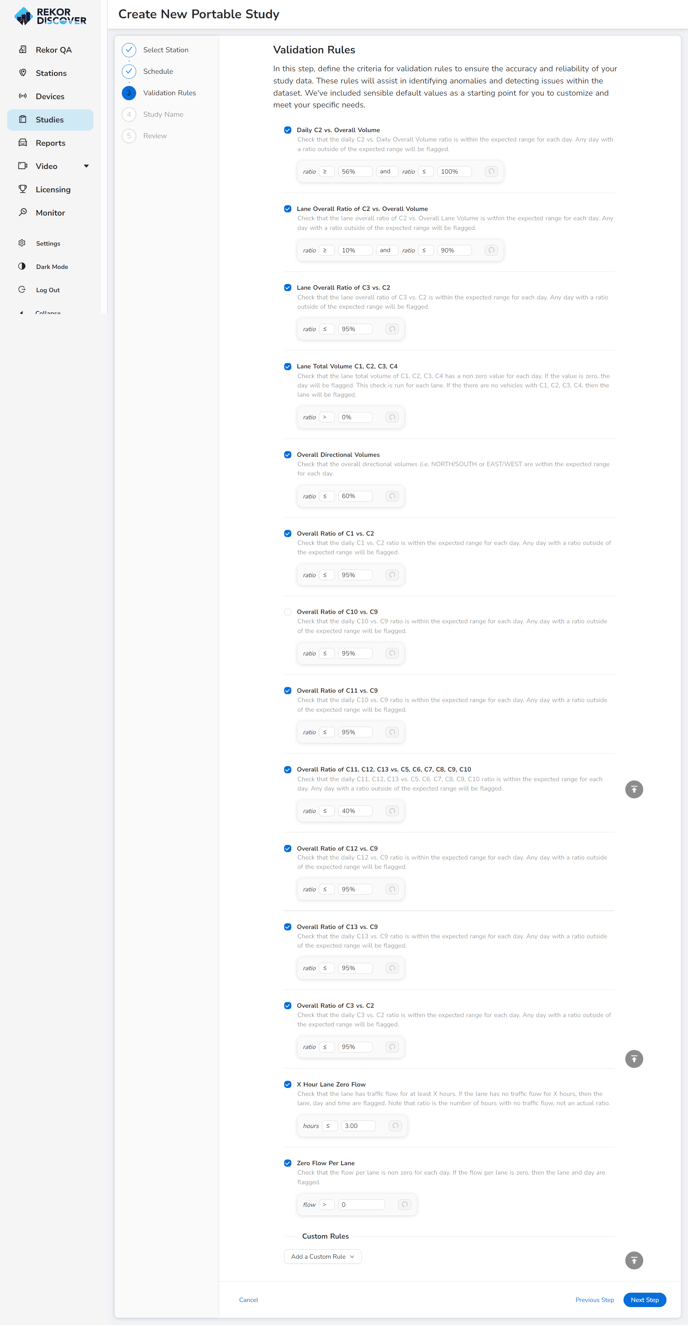
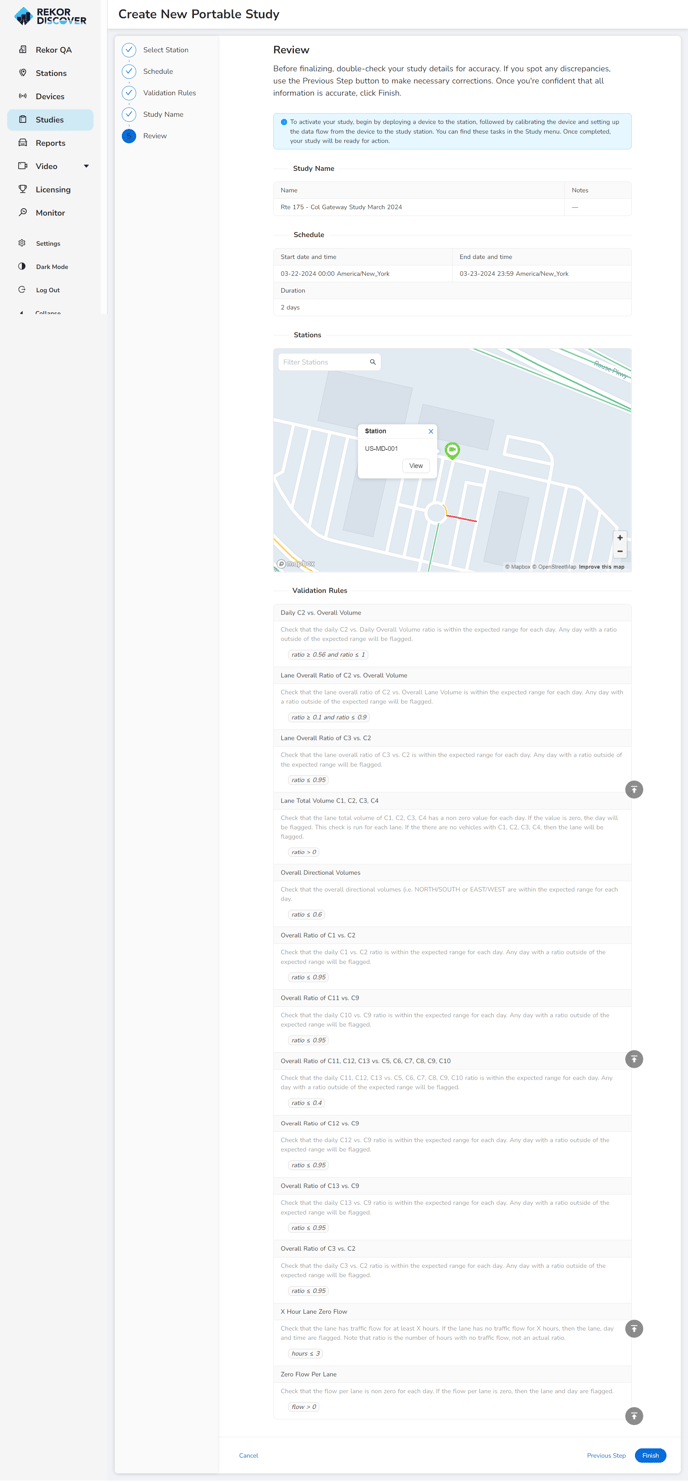
- Daily C2 and Overall Volume: Check that the daily C2 vs. Daily Overall Volume ratio is within the expected range for each day. Any day with a ratio outside of the expected range will be flagged.
- Lane Overall Ratio of C2 vs. Overall Volume: Check that the lane overall ratio of C2 vs. Overall Lane Volume is within the expected range for each day. Any day with a ratio outside of the expected range will be flagged.
- Lane Overall Ratio of C3 vs. C2: Check that the lane overall ratio of C3 vs. C2 is within the expected range for each day. Any day with a ratio outside of the expected range will be flagged.
- Lane Total Volume C1, C2, C3, C4: Check that the lane total volume of C1, C2, C3, C4 has a non zero value for each day. If the value is zero, the day will be flagged. This check is run for each lane. If the there are no vehicles with C1, C2, C3, C4, then the lane will be flagged.
- Overall Directional Volumes: Check that the overall directional volumes (i.e. NORTH/SOUTH or EAST/WEST are within the expected range for each day.
- Overall Ratio of C1 vs. C2: Check that the daily C1 vs. C2 ratio is within the expected range for each day. Any day with a ratio outside of the expected range will be flagged.
- Overall Ratio of C10 vs. C9: Check that the daily C10 vs. C9 ratio is within the expected range for each day. Any day with a ratio outside of the expected range will be flagged.
- Overall Ratio of C11 vs. C9: Check that the daily C10 vs. C9 ratio is within the expected range for each day. Any day with a ratio outside of the expected range will be flagged.
- Overall Ratio of C11, C12, C13 vs. C5, C6, C7, C8, C9, C10: Check that the daily C11, C12, C13 vs. C5, C6, C7, C8, C9, C10 ratio is within the expected range for each day. Any day with a ratio outside of the expected range will be flagged.
- Overall Ratio of C12 vs. C9: Check that the daily C12 vs. C9 ratio is within the expected range for each day. Any day with a ratio outside of the expected range will be flagged.
- Overall Ratio of C13 vs. C9: Check that the daily C13 vs. C9 ratio is within the expected range for each day. Any day with a ratio outside of the expected range will be flagged.
- Overall Ratio of C3 vs. C2: Check that the daily C3 vs. C2 ratio is within the expected range for each day. Any day with a ratio outside of the expected range will be flagged.
- X Hour Lane Zero Flow: Check that the lane has traffic flow for at least X hours. If the lane has no traffic flow for X hours, then the lane, day and time are flagged. Note that ratio is the number of hours with no traffic flow, not an actual ratio.
- Zero Flow Per Lane: Check that the flow per lane is non zero for each day. If the flow per lane is zero, then the lane and day are flagged.
- If Custom Rules are needed, add the rule.
- Click Next Step.
Study Name
In this step, take a moment to choose a name that captures the objectives and purpose of the study. Optionally provide any notes that can offer context or insights about the study.

- Name: Give the study a distinctive name that reflects its purpose and content.
- Notes: Add any notes or additional information that will help you and your team understand the goals, scope, or specific aspects of the study.
- Click Next Step.
Review
Before finalizing, double-check the study details for accuracy. If there are any discrepancies, use the Previous Step button to make necessary corrections. Once all information is accurate, click Finish.
Once the study is created, you must deploy the device, calibrate the device, and set up the data flow.