After the device has been deployed, the device must be calibrated to accurately detect vehicle classifications, lane positions, travel directions, and vehicle speeds. On the Studies page, click the Scales icon next to the study name.

Device Calibration Process
- Take Snapshot of Roadway:
Take Snapshot of Roadway: To start, click the Take Snapshot button to capture a picture of the roadway. Ensure there are no vehicles in the frame and that all lanes are visible when taking the snapshot. This image will help to identify the near and far lane boundaries, as well as the lane dividing lines. You may need to retake the snapshot a few times to get the best result. - Specify Median Type and Posted Speed Limit:
Choose the median type and set the posted speed limit. - Define Near and Far Lane Boundaries:
Set both the near and far lane boundaries to limit the detection area to the monitored travel lanes. - Define Lane Dividing Lines:
Between the established boundaries, draw lines over the lane-dividing lines to delineate the road lanes. Specify up to four lane-dividing lines per lane separation. When drawing these lines, provide the average length of the lane's dividing-lines, improving the device's ability to accurately detect vehicle classifications and speeds.
If preferred, simply click the Assisted Calibration button. This will prompt the system to draw the lane-dividing lines. After, make any necessary adjustments to these lines as needed.
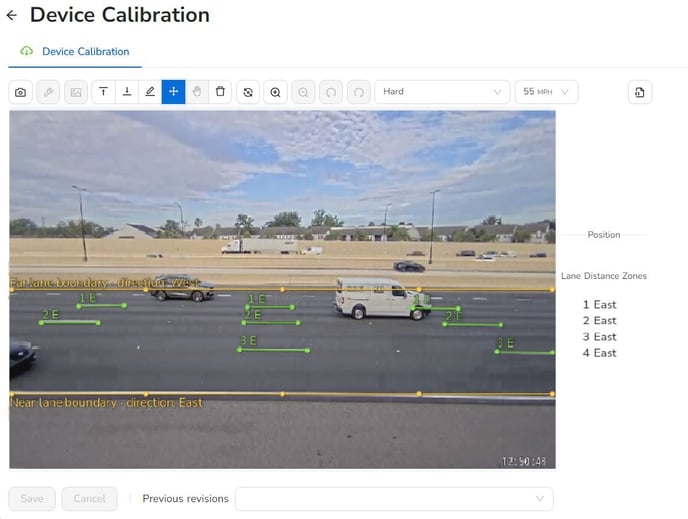
Road lanes are organized into distance zones, each assigned a number starting from 1 to represent the farthest distance from the device. As the numbers increase, the zones get progressively closer. This numbering system helps to easily organize and understand the lanes in relation to their proximity to the device. Far lanes are optimized for trajectories further away from the camera, while near lanes are optimized for trajectories closer to the camera.
Upon completion, the lane distance zones and directions of travel will be configured. Then proceed to the Set Up Data Flow task.