Incidents can be created through several processes:
- Manually by a user
- These incidents are automatically confirmed
- Through a Computer Aided Dispatch (CAD) system
- These incidents will need to be confirmed/rejected by a user
- By the platform itself using Artificial Intelligence (AI)
- These incidents will need to be confirmed/rejected by a user
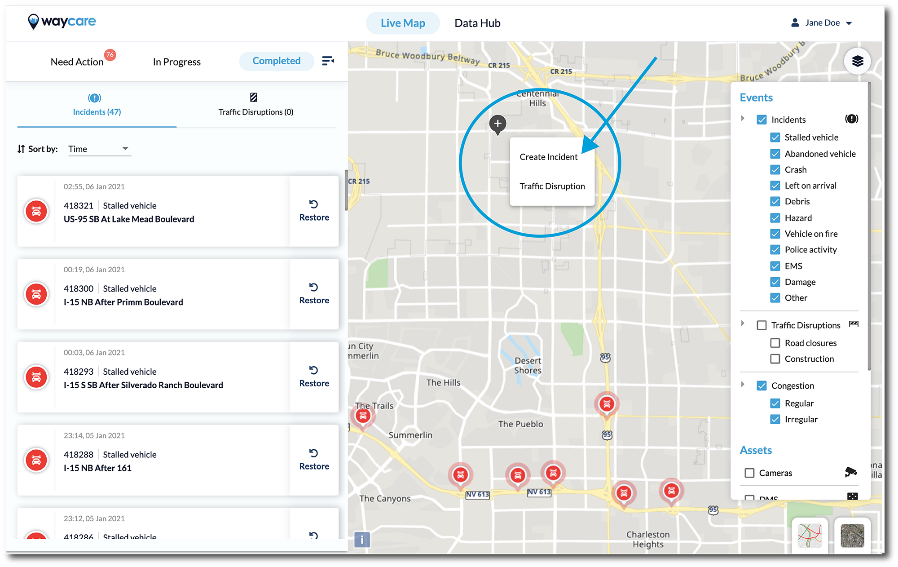
To create an incident using a mouse:
- Right-click where you wish to add the incident on the live map
- Select “create incident”
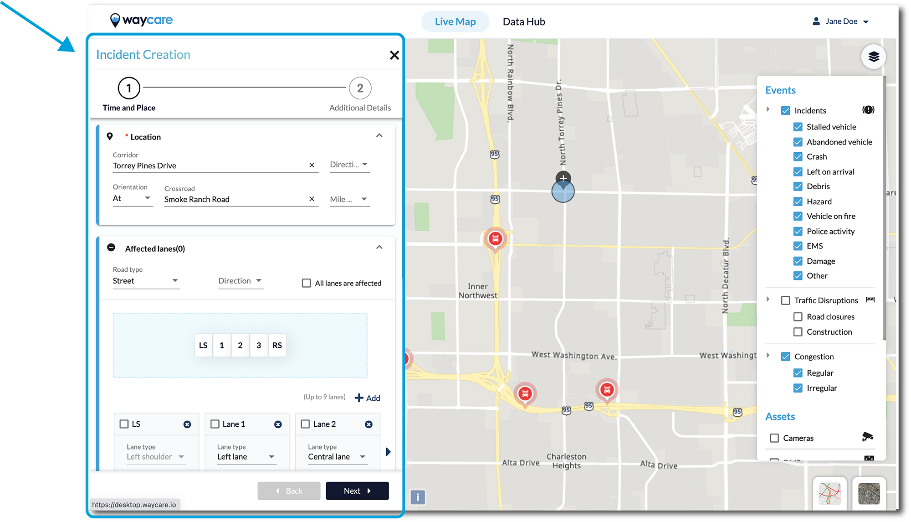
- Fill out details for "Time and Place" and "Additional Details".
- Click on the "Create" button.
Note: If you selected the box to “Notify Public” during step 15, a pop-up will appear allowing you to select the external source and the type of information you would like to send out. Select the application that you wish to notify (examples include Waze, 511, and Twitter).
Fill in the message details with relevant details that will appear in the incident description.
Click “Send.”
To create an incident using a trackpad:
- Click using two fingers where you wish to add the incident on the live map
- Select “create incident”
- Fill out details for "Time and Place" and "Additional Details".
- Click on the "Create" button.
Note: If you selected the box to “Notify Public” during step 15, a pop-up will appear allowing you to select the external source and the type of information you would like to send out. Select the application that you wish to notify (examples include Waze, 511, and Twitter).
Fill in the message details with relevant details that will appear in the incident description.
Click “Send.”