TABLE OF CONTENTS
The Configuration menu provides a management center to introduce and configure all involved items of your LPR system. Alerts, Agents, WebHooks, and Users can be created and managed under this menu and are described in more detail below.
 "Configuration" menu
Alerts
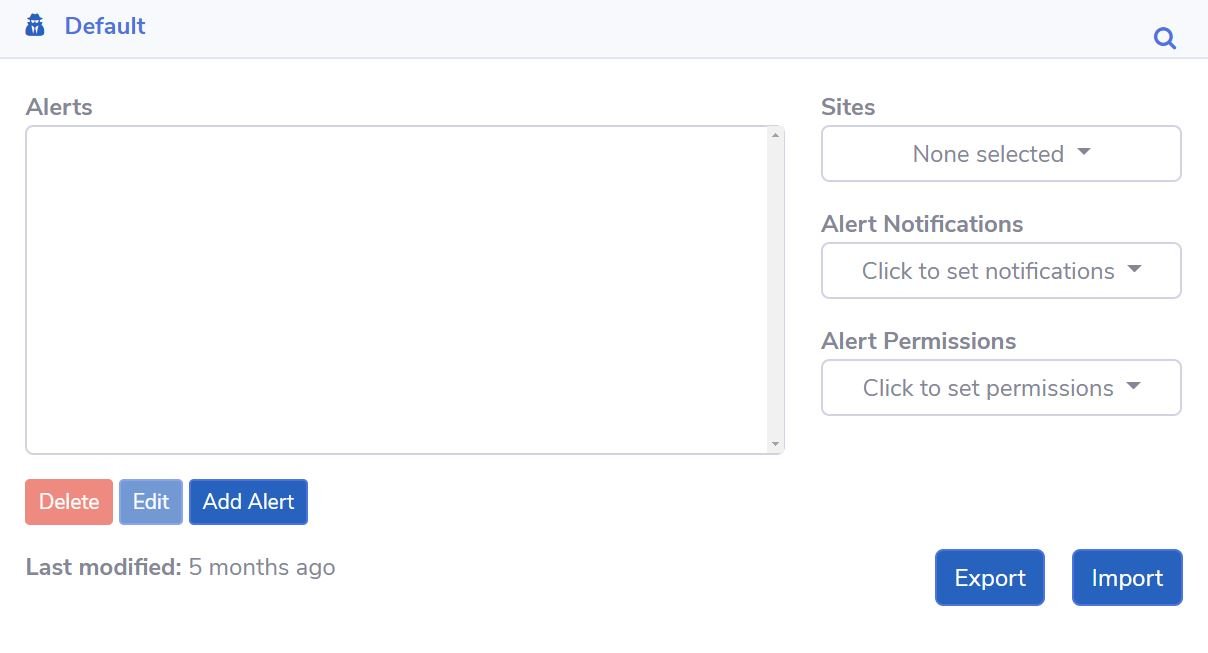
Alerts can be managed on the Alerts page. Alert Lists will be shown in one panel and individual alerts for plates within the selected list (highlighted in grey – below, left) will be shown on a second panel (below, right).
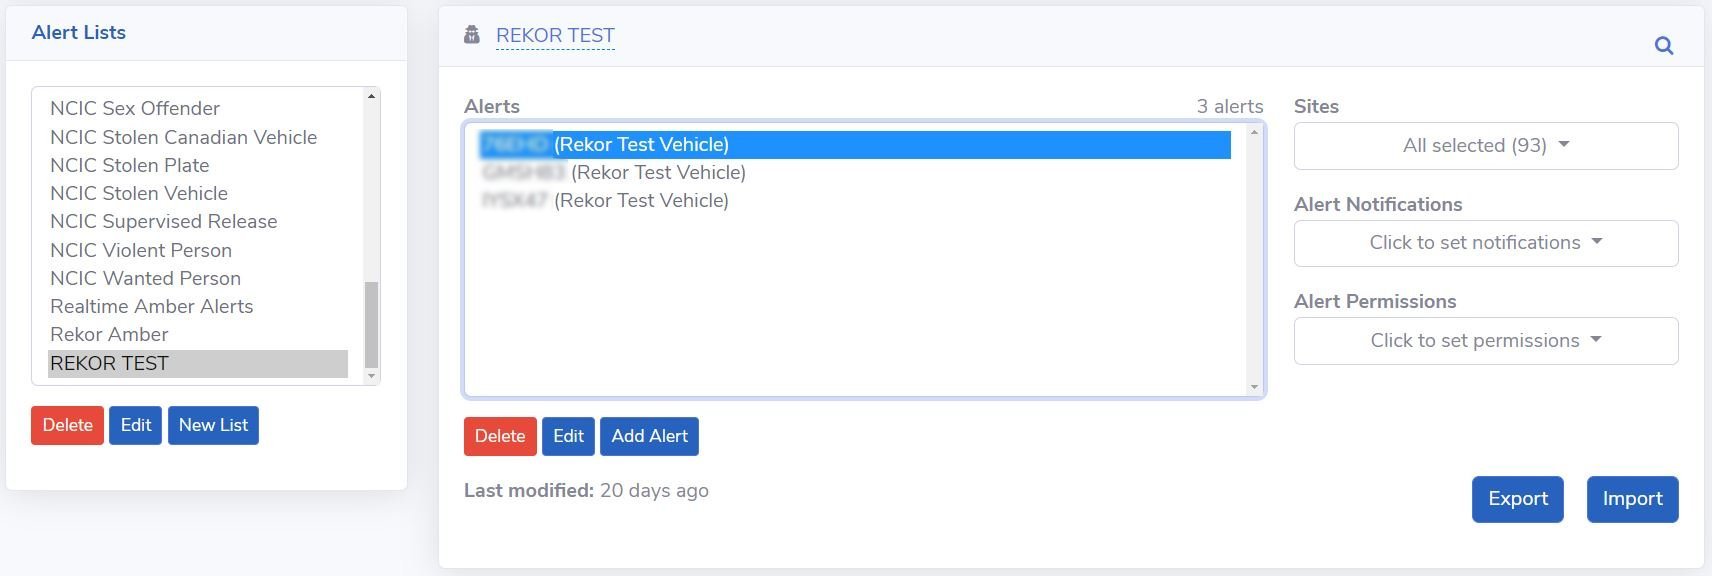 Panel showing the Alerts Lists (left); Panel showing the actual alerts within the selected list (right)
Alert List Management
Clicking on New List opens another window to configure the alert list settings.
Alert list name, type (blacklist or whitelist), and direction of travel for the new list should be entered or selected from drop-down menus under the “General” tab (see below).
-
Blacklist: Any plate number on this list will trigger an alert upon capture.
-
Whitelist: Any plate number that is NOT on this list will trigger an alert upon capture.
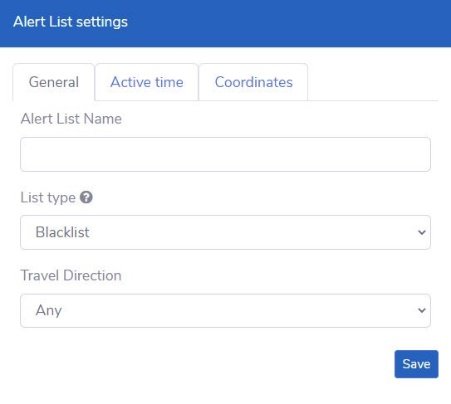 General settings for the newly created Alert List
Alerts are active 24/7 unless a timing restriction is defined under the “Active Time” tab. Once enabled, you can set the active days and time range for the selected alert list to operate (see below).
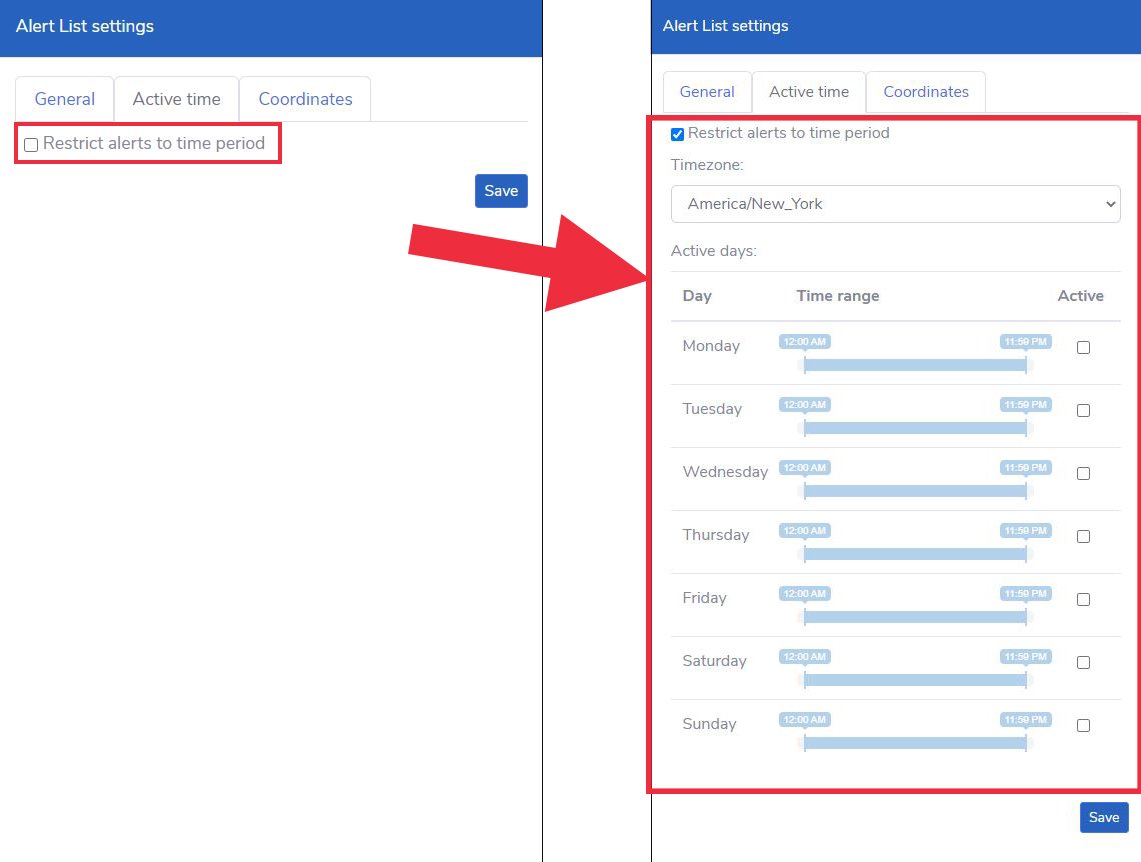 “Active Time” settings of an alert list
Under the Coordinates tab, you can set a location for the list to get notified upon capture or entrance of a plate within the specified coordinates. Once the “Restrict alerts to coordinates” box is enabled, the panel will extend to show options for defining boundaries on the map – as shown below.
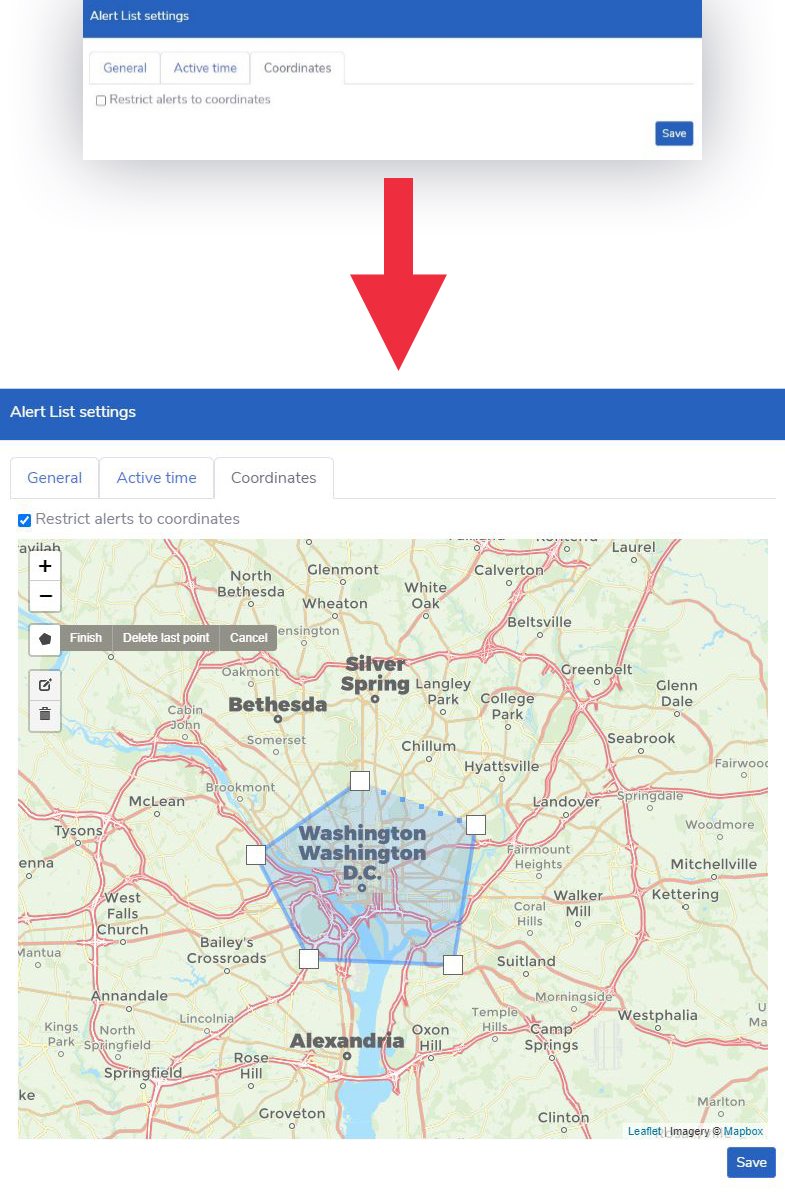 Coordinate selection for a specific alert list
All the settings and configurations applied to an individual Alert List can be modified using the Edit button at the bottom of the “Alert List” panel.
Alert Management
On the right-hand side of the Alert List panel you have a secondary panel that allows you to delete, edit or add alerts to a pre-existing alert list. For example, you can select which sites to add or remove, who will receive the email or SMS notifications for an alert, or who can have access to this list.
 Individual alert management options
Under the same panel (above), you can also import new alert lists or export the currently existing lists. The exported lists will be in Comma Separated Value (.csv) format. To import a list, it must also be a .csv file that contains a list of plate numbers.
Click on Add Alert and a new window will appear to allow input information for “Plate Number”, “Description” and “Match Strategy”.
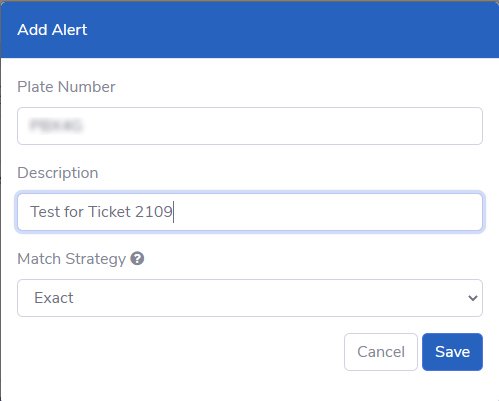 "Add Alert" window
Selecting “Exact” matches the best results for a plate group versus “Lenient” which matches the best result for a plate number.
Adjusting “Match Strategy” provides a higher chance of catching the plate but increases the chance of a false positive alert.Agents
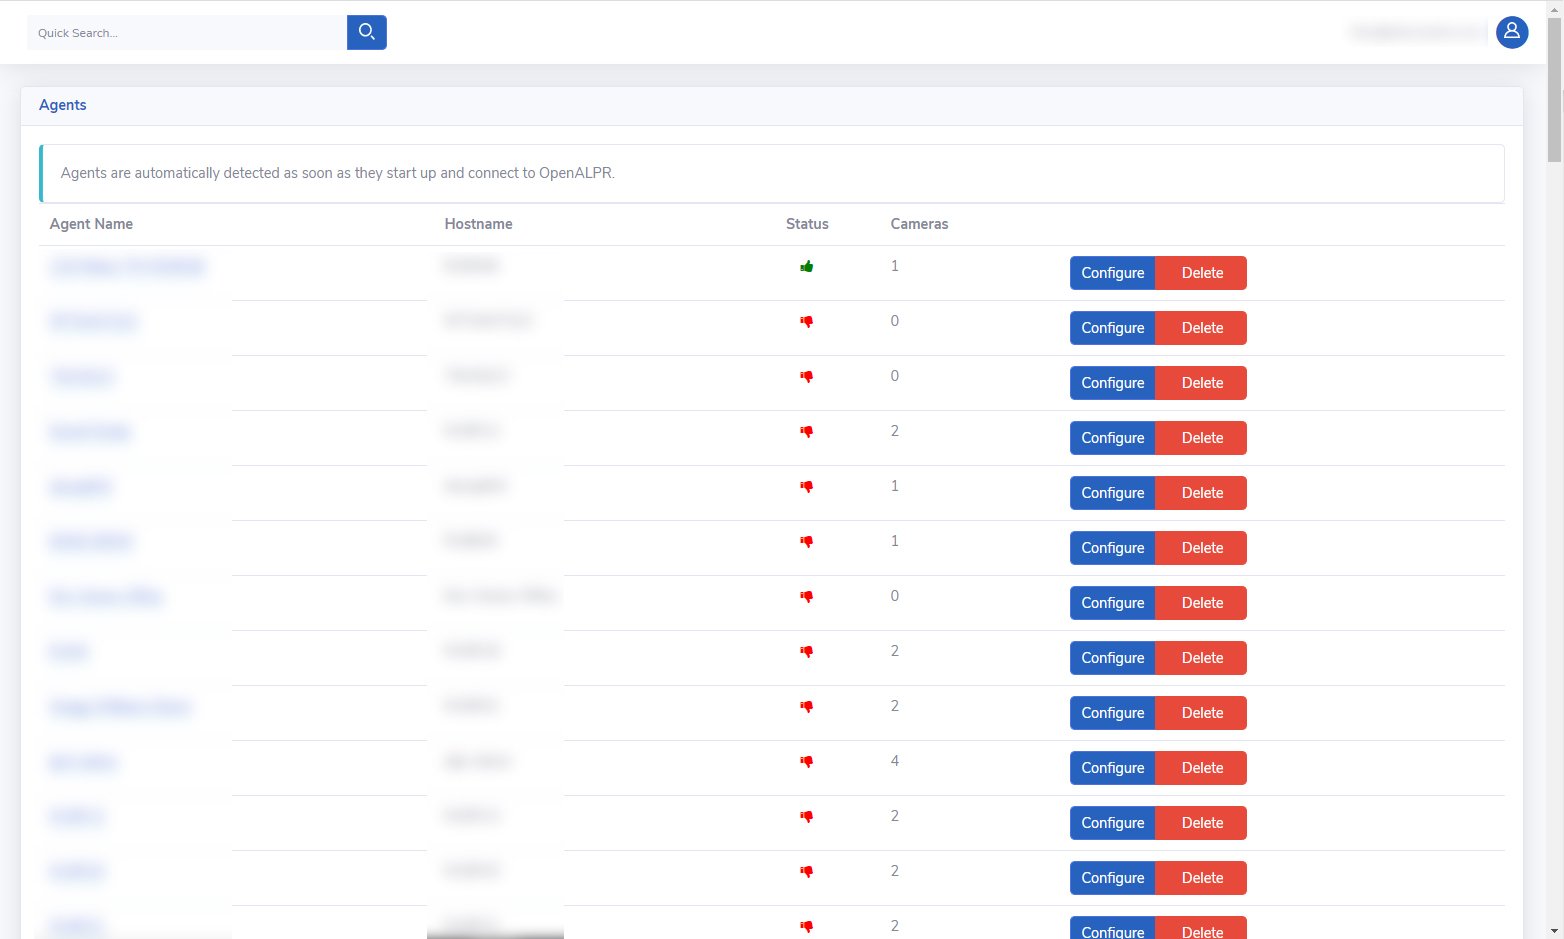
A list of all active and inactive agents will be shown in the detailed view of the “Cameras” menu where the green thumbs up represent active status and the red thumbs down depicts inactive status. This is the easiest way to check whether your cameras are actively reading plates.
Agent Name
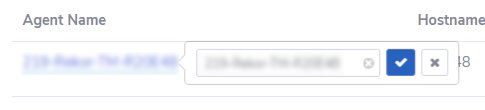
The agent name can be changed in order to customize the order of cameras. Examples of naming schemes are the specific location of the camera, cross streets, or an address. To change the name of the agent, click on the agent name, and a new window will open.
 Agent name editing screen
Click the “X” with a gray circle background inside the box to clear the current name and enter the new name. Click on the blue-boxed checkmark to save.
Agent Configuration
Under the “Agents” screen, you can also view the current video stream and agent status. Additional functionalities include new video streams configuration, agent parameters settings, and review of the current live agent log which can be accessed and set by clicking on the Configure button of the specific agent. Unused agents can also be removed by clicking on the Delete button in the same box.
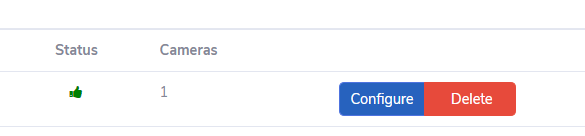 Agent quick management options
Clicking Configure on an agent that is not connected, will show an “agent_not_connected” error.
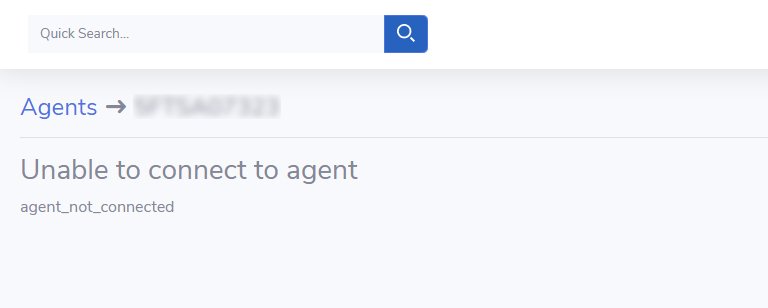 Agent disconnect error
Upon encountering this error, restart the system and check for the agent connection shortly after. If the error persists, open a ticket with Rekor Support at https://help.rekor.ai/.
Clicking Configure on a connected agent will redirect the user to the following screen.
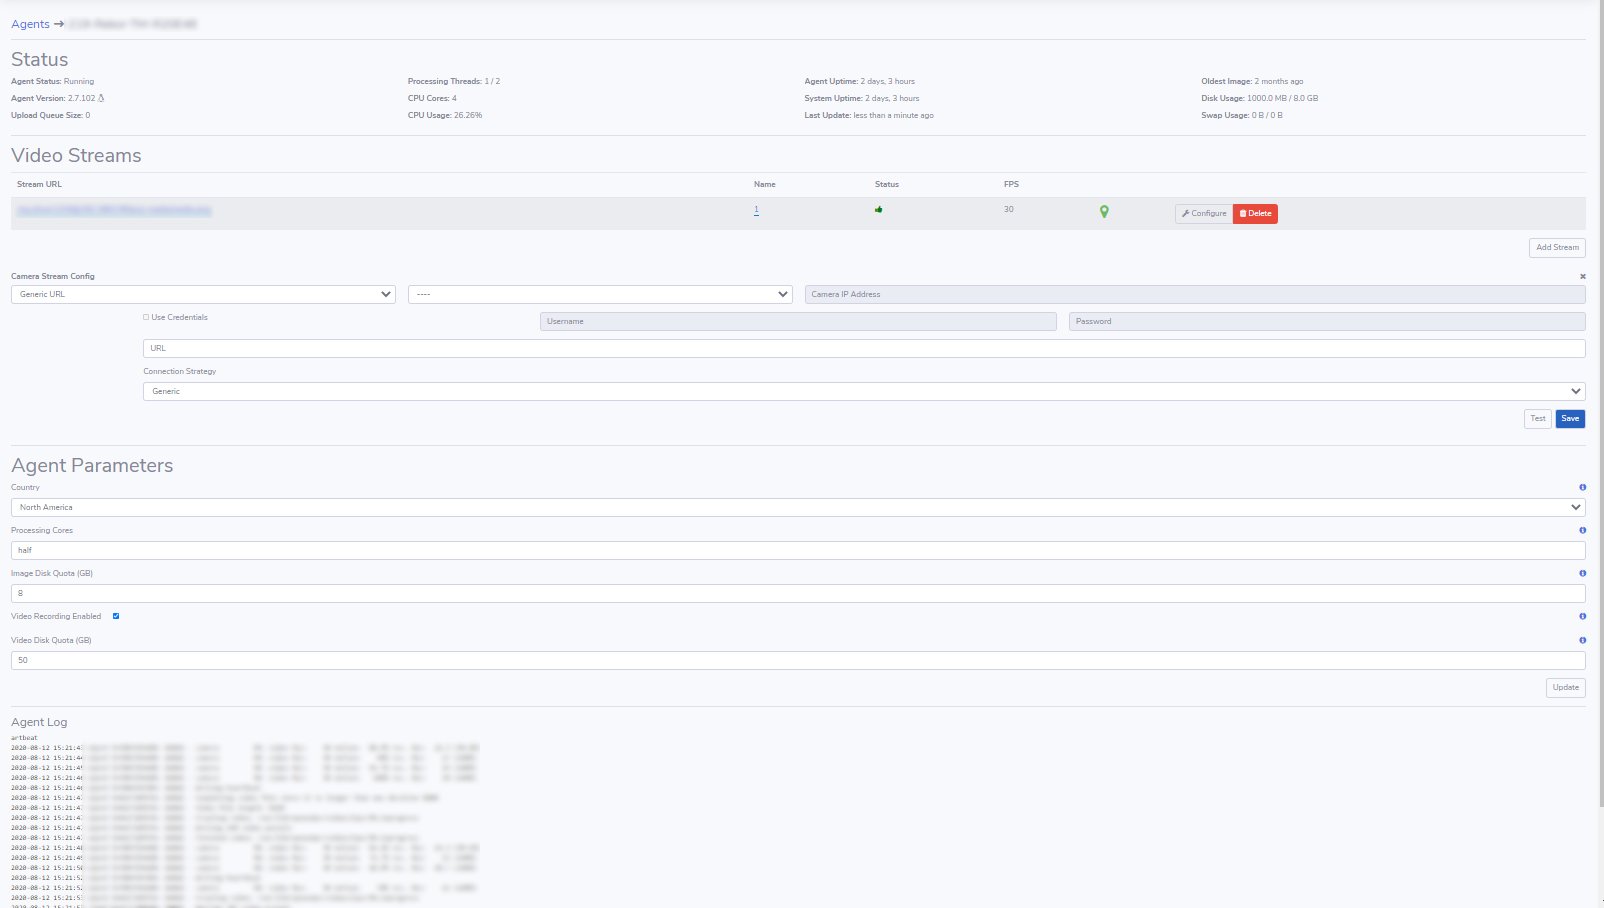
Status
The “Status” section shows the current state of a specific agent, agent version, CPU usage, Agent and System Uptime, and Hard Drive Capacity.
 Overview of the details shown in "Status"
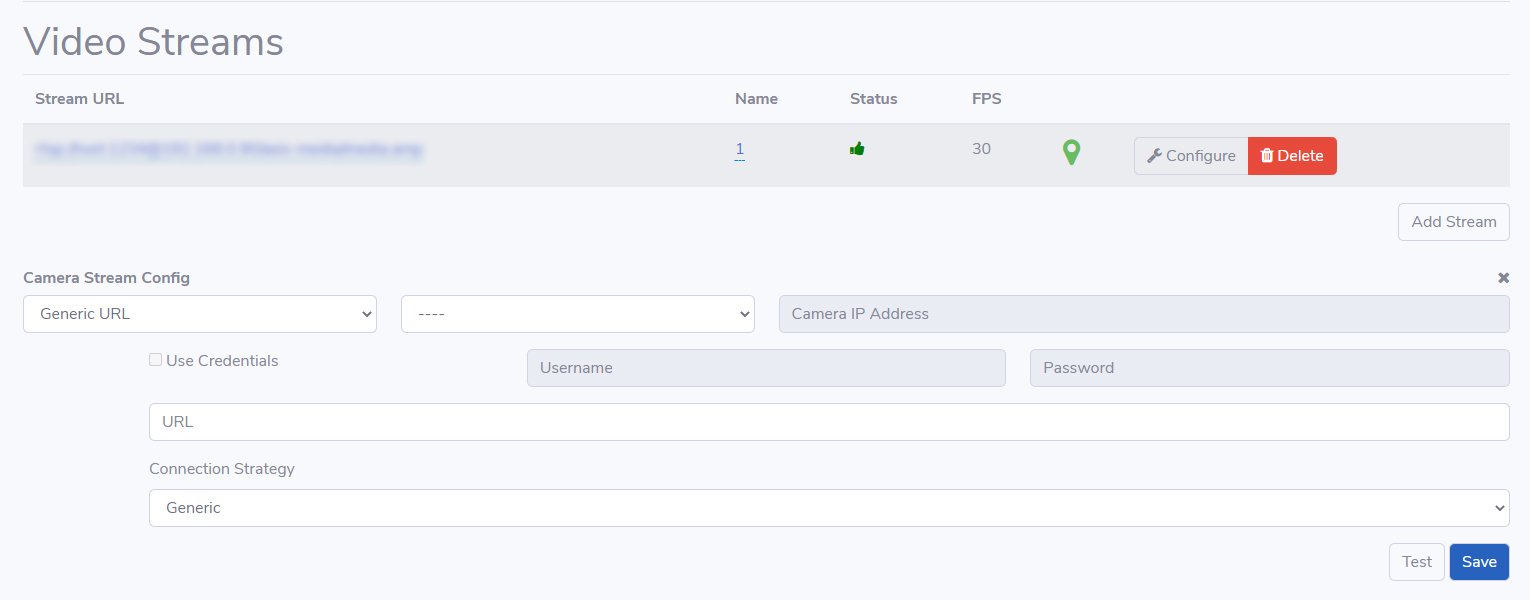
Video Streams
This section of the agent configuration screen shows all related configuration details of the camera.
 Overview of the "Video Streams" window
The Stream URL sub-section lists the video stream URL, camera name, status, frames per second (FPS), and location of the camera. Additional video streams can be added if needed.
 Overview of the "Stream URL" sub-section
The “Camera Stream Config” sub-section allows users to customize the stream to specific camera brands or use a generic URL.
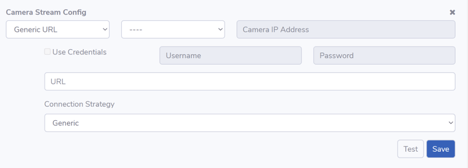 Overview of “Camera Stream Configuration” screen
Once a camera stream's information is filled in, test the connection to make sure it is configured correctly before saving the configuration.
-
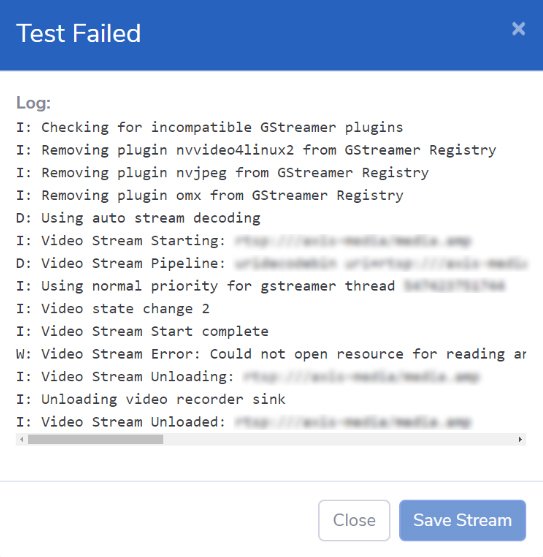
If the configuration checks fail, a “Test Failed” popup window will appear.
-
Upon successful completion of the configuration check, a “Test Successful” popup window will appear.
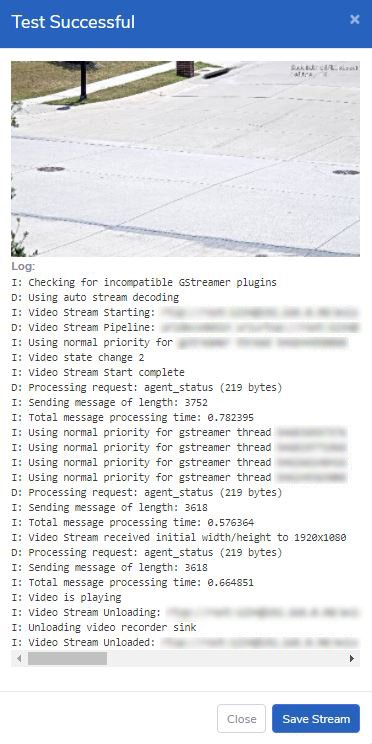 Successful “Camera Stream Configuration” test result screen with sample result
Agent Parameters
The “Agent Parameters” section allows you to specify Country, Processing Cores, Image Disk Quota, option for Video Recording Enabled, and Video Disk Quota.
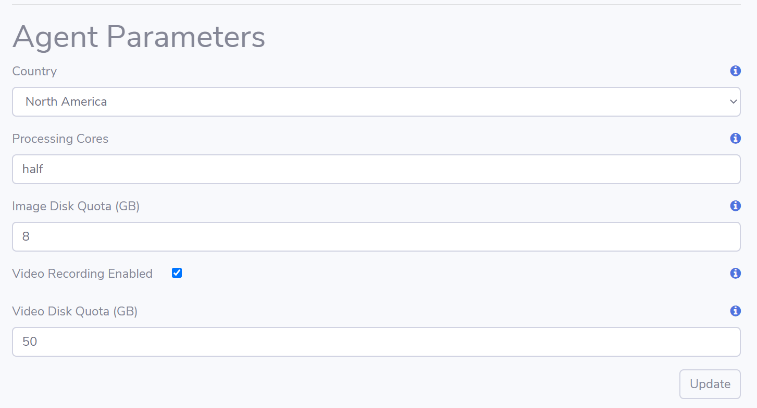 Overview of Agent Parameters sub-section
Agent Log
The “Agent Log” provides detailed information about the activities and status of the agent in real-time. It records all the information about events that happen on the system. Also, “Agent Start” and “Agent Stop” features are included at the bottom of the “Agent Log” sub-section to be used as needed.
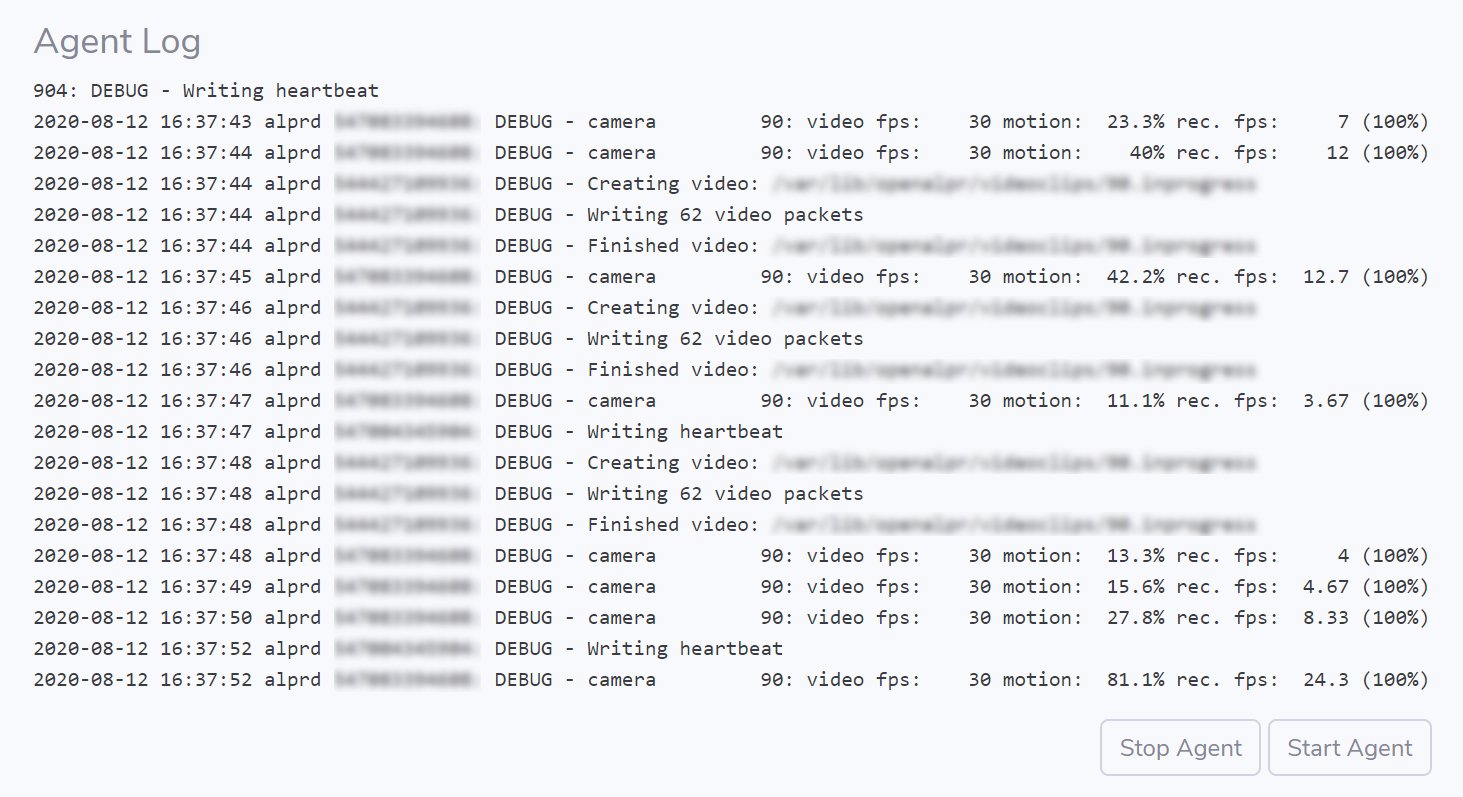 "Agent Log" sub-section overview
WebHooks
The WebHooks page allows you to send an HTTP POST to any URL every time a plate is received or an alert is triggered. The POST body contains the license plate data.
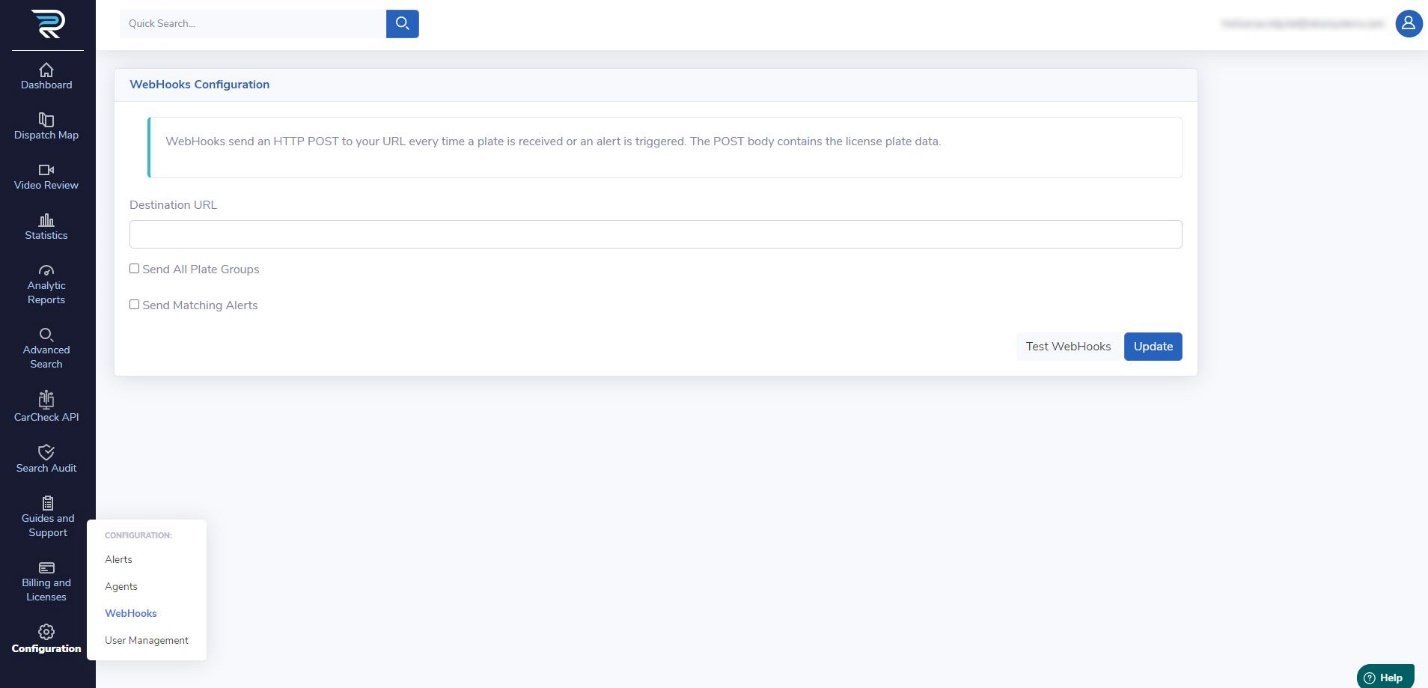 Overview of “WebHooks” configuration menu and screen
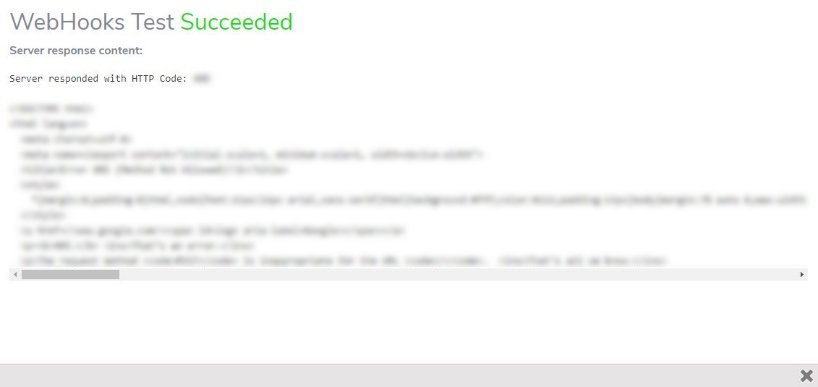
Once “Destination URL” has been set, the WebHooks can be tested. Once a test is passed, a result panel will show up and display the test results.
The user also receives a notification if the test is unsuccessful.
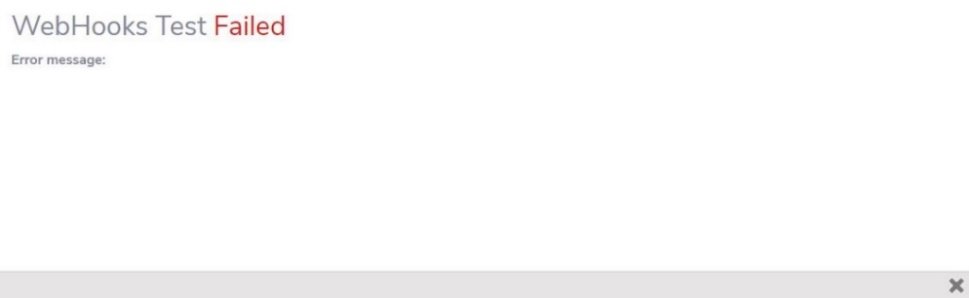 Failed “WebHooks” test result screen
User Management
Clicking on the Create Invite button opens a separate form to input information about the invitee including “Email”, “First name”, “Last name”, “Groups”, and “Description” about the user, field of operation, or other related information to be noted on your profile.
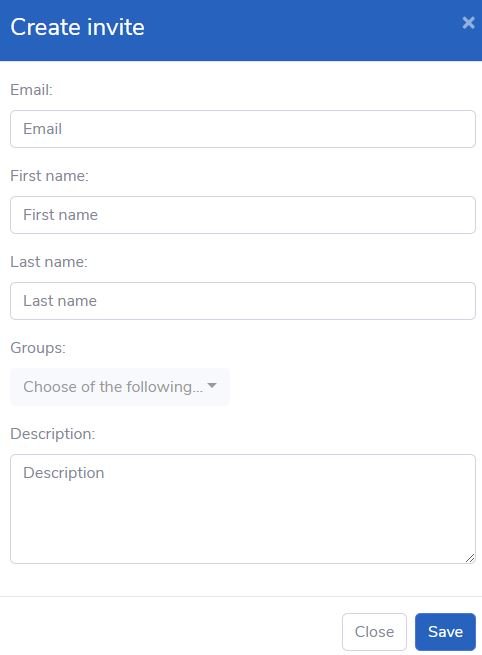 Overview of “Create Invite” screen
Table Export/Import
A table list of all users (active or inactive) can be exported to or imported from a .csv file.
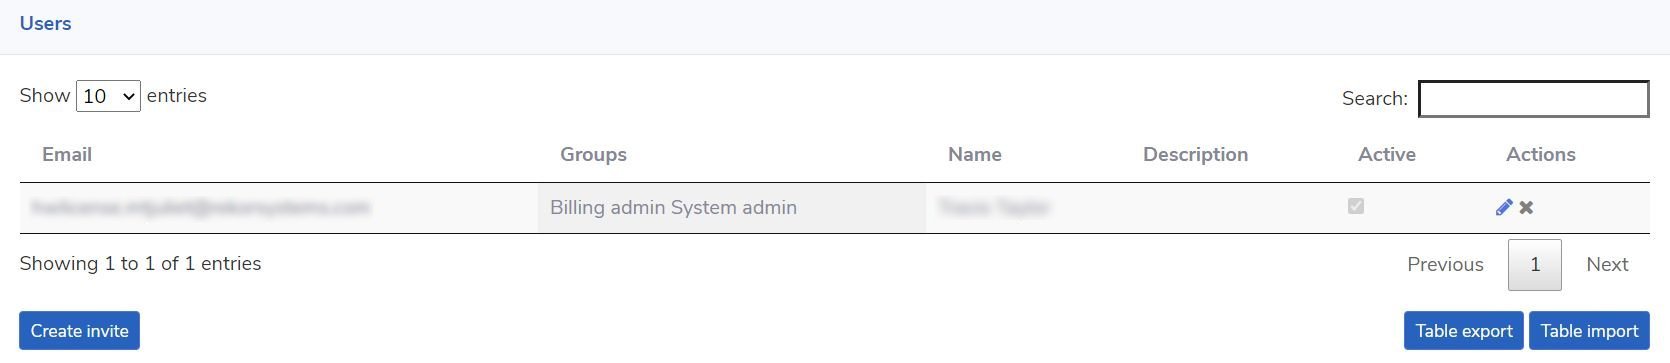 User list overview showing table export and import options