You can add an incident manually if you have the relevant details.
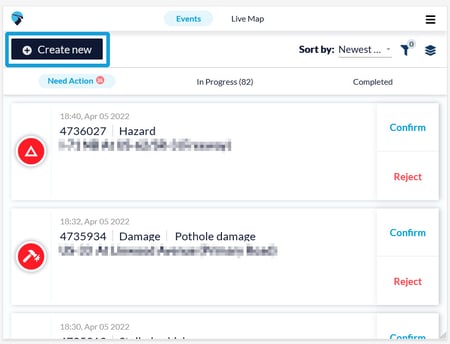
- To create an incident touch the Create new button in the upper left-hand corner of the screen.
-
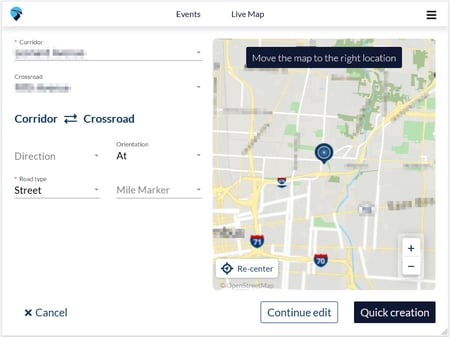
A screen appears with a map enabling you to select the precise location and details of the incident
-
Location:
-
Identify and update the correct location by either moving the map around until the pinpoint matches the correct location or by updating the location fields (corridor, crossroad, direction, orientation etc.)
-
Select Quick Creation in case there you are in a hurry and cannot stale time.
-
If you select Continue edit, you can continue to add additional details:
-
- Time (this field is mandatory)

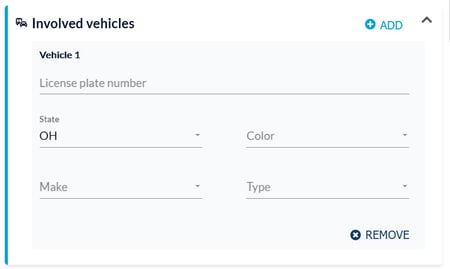
- Involved vehicles (this field is optional)
You can add the details of any civilian's vehicle that is involved in the incident.
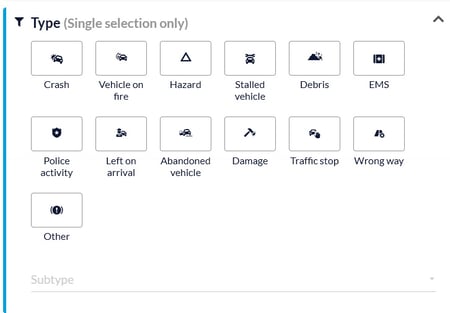
- Type (of incident) (this field is mandatory)
-
Select the option that best describes the incident you are reporting.
-
Subtype (this field is optional): To report fatalities, injuries, or additional details, click on the drop-down menu to select a subtype.
-
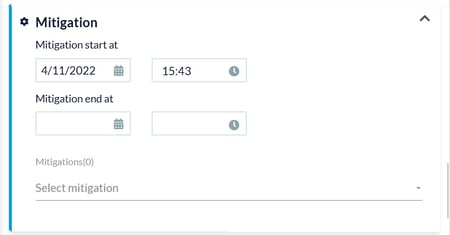
- Mitigation (this field is mandatory)
-
If your account has mitigation types defined, they will appear in this section.
-
Multiple selections are possible.
-
Touch the label to apply it to the incident - a checkmark appears.
-
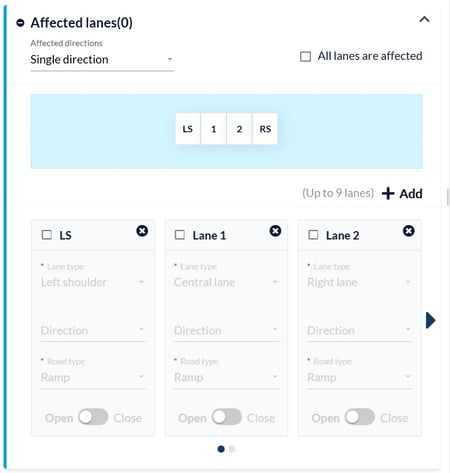
- Affected Lanes (this field is optional)
You can add details about affected lanes by doing the following:- If desired, select a Road type and Direction from the dropdown menu.
- Click to highlight all lanes that were affected by the incident; lanes are displayed left to right.
- Users have the option to add additional lanes by selecting the + Add button.
- Cameras
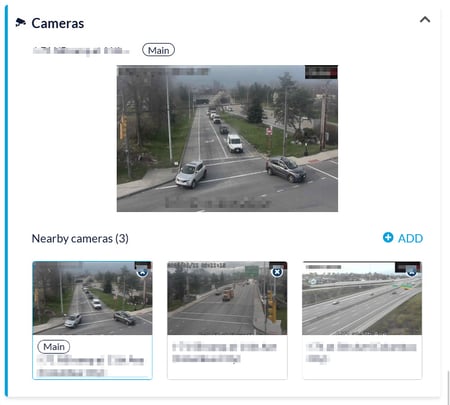
- If there are cameras within the vicinity of the incident you are reporting, they will be automatically added to the report.
-
You also have the ability to add more cameras by doing the following:
-
Touch + Add.
-
Type in the camera ID you would like to add.
-
Add the camera by selecting the ID.
-
-
Touch the Next button to advance to the additional details portion of the report.

-
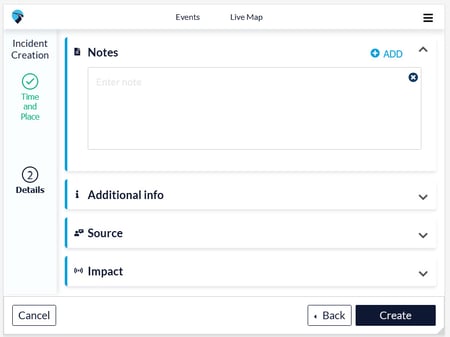
Notes (this field is optional)
- Users can add multiple notes.
- Note deletion can be accomplished by touching the X button.
- Each note is automatically time-stamped.
- This section enables you to add relevant details not included in other portions of the report.
- Additional Info (this field is optional)
- If you have additional info added to your account, then you can select them here.
- Touch the label to apply it to the incident - a check mark appears.

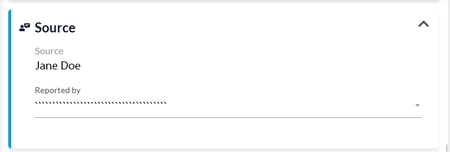
- Source (this field is optional)
- Click the dropdown menu under Reported by.
- Make your selection.
- This section automatically fills in the details of the user who created the incident.
- Impact (This field is optional)
- The platform enables you to list up to 10 injuries and/or fatalities per incident.
- The end time of the incident is automatically calculated based on the amount of time entered in the duration field.

- External ID (this field is optional)
- You can add the number of the external ATMS ID and CAD ID.

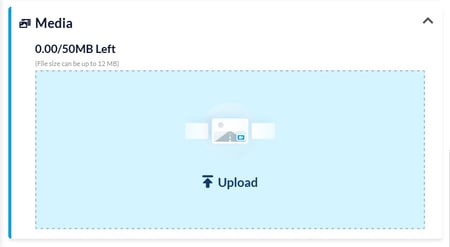
- Media (this field is optional)
-
You can add a total of 50MB of media files (no more than 12 MB per file).
-
Use your device's camera to take a photo.
- Touch Upload and navigate to the location on your device where the file is located file from your device using the link that says upload or take a photo directlly via your tablet device.
-
- Click the Create button to complete the creation of your new report.
