If you are the Administrator of your account, navigate to the account management area and follow these steps.
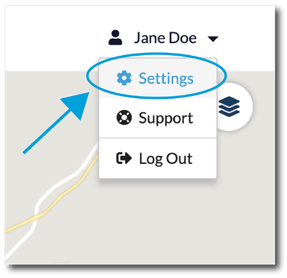
- Click on your username in the top right corner of the screen.

- Select “Settings” from the drop-down menu.
-
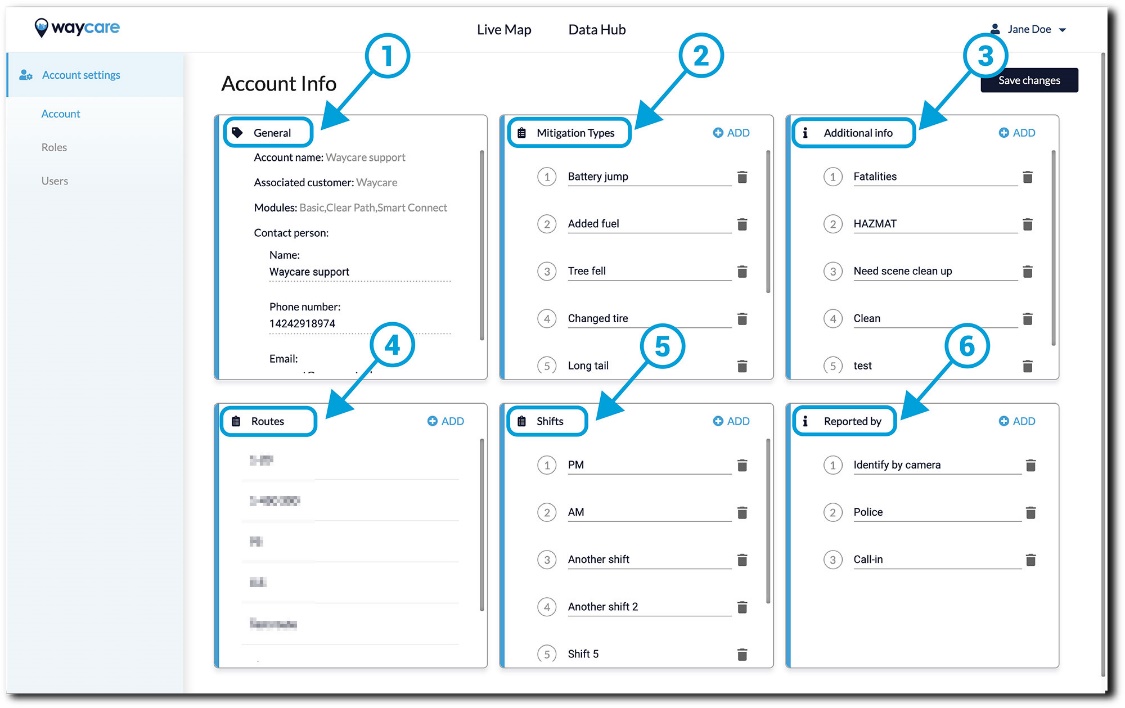
Selecting “Settings” will bring you to the Account Settings area.
In this section, you will be able to add new mitigation types, additional info, and sources reported that will appear in incident reports and manage the routes/shifts of other users.
Additionally, you will find six boxes detailed below:
- General - You will be able to find information about the account such as the associated customer, name, modules available, and the account contact person.
- Mitigation Types - This is where you will be able to add relevant types of mitigation that are applicable to your incident management process. Each entry added here will be shown as an option to select in new incident reports.
- Additional Info - This is where you will be able to add certain tags that will be needed in new incident reports.
- Routes - Certain roles within your organization may require the assignment of routes. As an administrator, you will have the ability to create and manage these aspects for those users. A route is a pre-defined course a user has been assigned.
- Shifts - Certain roles within your organization may require the assignment of shifts. As an administrator, you will have the ability to create and manage these aspects for those users. A shift is a defined time period in which a user performs their responsibilities.
- Reported by - Here you can add options for a user that created the incident. Each entry added here will be shown as an option to select in new incident reports.
Note: Routes and shifts are optional but allow greater accountability for the individual user.