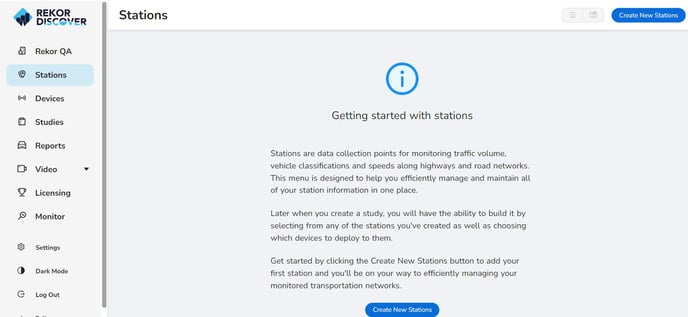
Stations are data collection points for monitoring traffic volume, vehicle classifications and speeds along highways and road networks. The menu is designed to help efficiently manage and maintain all of the station information in one place.
Later when the study is created, there will be the ability to build it by selecting from any of the stations that have been created as well as choosing which devices to deploy to them.
Get started by clicking the Create New Stations button to add the first station to efficiently manage the monitored transportation networks.
Input Options
Decide how the station information will be entered. There are two options:
- Manual Entry – typically used when setting up one site.
- Imported from a .CSV file – typically used for setting up multiple sites.
In this example, the manual entry method will be explained.
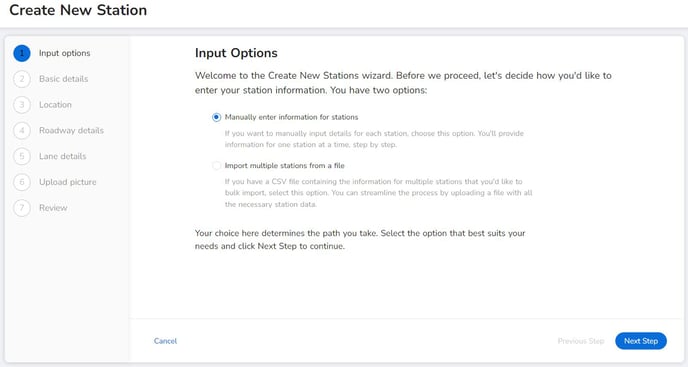
Select Manually enter Information for stations then click Next Step.
Basic Details
Enter the unique Station ID for this location along with other details. This ID is essential for tracking and analyzing collected data. Fill out all required fields accurately to ensure there is sufficient station information.
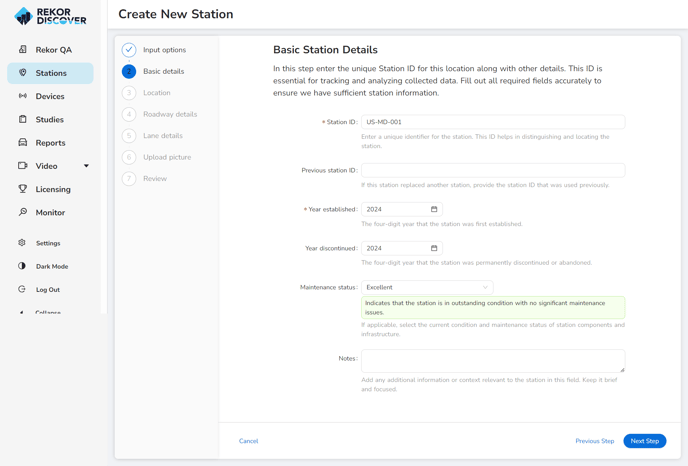
- Station ID: Enter a unique identifier for the station. This ID helps in distinguishing and locating the station.
- Previous Station ID: If this station replaced another station, provide the station ID that was used previously.
- Year Established: The four-digit year that the station was first established.
- Year Discontinued: The four-digit year that the station was permanently discontinued or abandoned.
- Maintenance Status: If applicable, select the current condition and maintenance status of station components and infrastructure from the drop-down menu.
- Notes: Add any additional information or context relevant to the station in this field. Keep it brief and focused.
- Click Next Step.
Location
In this step provide the geographic location. Make sure to fill out all required fields accurately. We advise against modifying these details once the initial study is completed using this station.
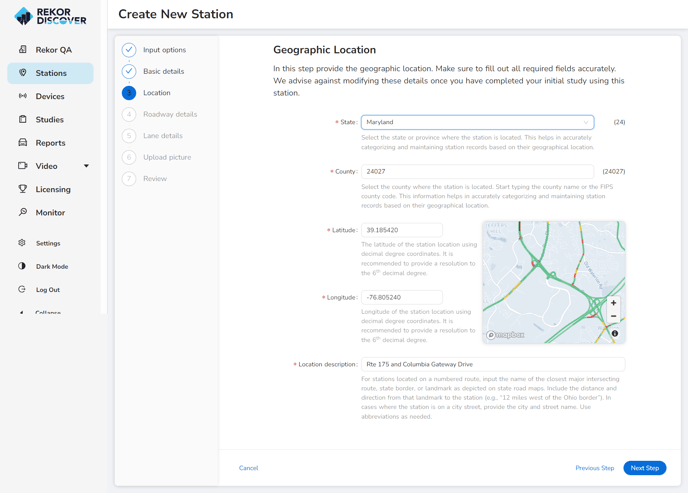
- State: Select the state or province where the station is located. This helps in accurately categorizing and maintaining station records based on their geographical location.
- County: Select the county where the station is located. Start typing the county name or the FIPS county code. This information helps in accurately categorizing and maintaining station records based on their geographical location.
- Latitude: The latitude of the station location using decimal degree coordinates. It is recommended to provide a resolution to the 6th decimal degree.
- Longitude: Longitude of the station location using decimal degree coordinates. It is recommended to provide a resolution to the 6th decimal degree.
- Location Description: For stations located on a numbered route, input the name of the closest major intersecting route, state border, or landmark as depicted on state road maps. Include the distance and direction from that landmark to the station (e.g., “12 miles west of the Ohio border”). In cases where the station is on a city street, provide the city and street name. Use abbreviations as needed.
- Click Next Step.
Roadway Details
In this step provide details about the roadway. Make sure to fill out all required fields accurately.
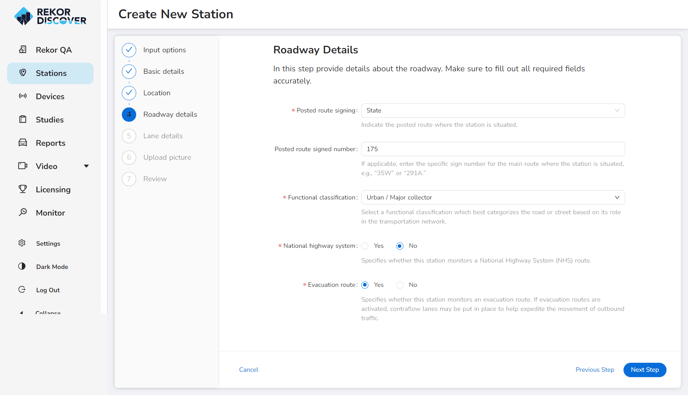
- Posted Route Signing: Indicate the posted route where the station is situated.
- Posted Route Sign Number: If applicable, enter the specific sign number for the main route where the station is situated, e.g., “35W” or “291A.”
- Functional Classification: Select a functional classification from the drop-down menu which best categorizes the road or street based on its role in the transportation network.
- National Highway System: Specifies whether this station monitors a National Highway System (NHS) route.
- Evacuation Route: Specifies whether this station monitors an evacuation route. If evacuation routes are activated, contraflow lanes may be put in place to help expedite the movement of outbound traffic.
- Click Next Step.
Lane Details
In this step, provide information regarding the lanes on the roadway. Include both a count and direction of lanes, regardless of whether the lanes will be monitored. This information is important for understanding traffic flow patterns and ensuring the flexibility to map device data to any lane created here.
- Click Add Lanes.
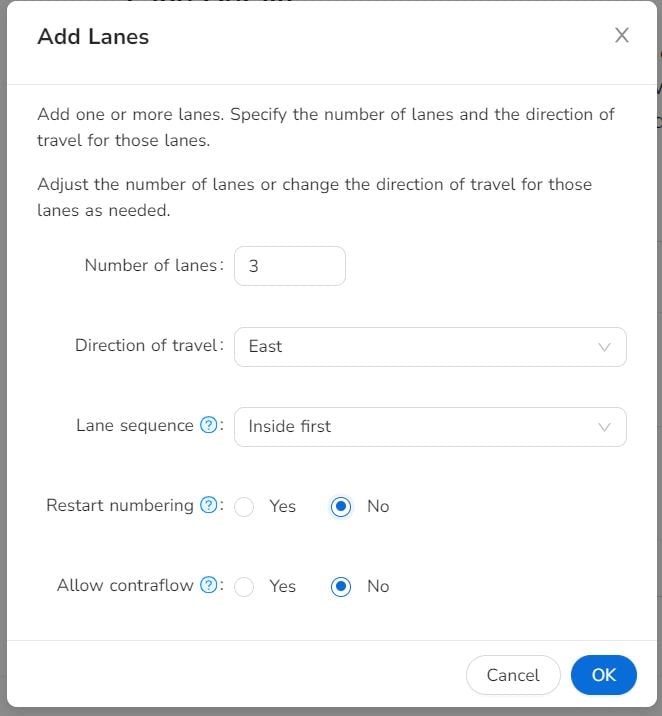
- Enter the Number of Lanes.
- Select the Direction of Travel.
- Select the Lane Sequence. In the Outside first arrangement, the rightmost “slow” lane is lane 1, with subsequent lanes increasing leftward. In the Inside first configuration, the leftmost “fast” lane is lane 1, with succeeding lanes increasing rightward.
- Select whether to restart the numbering. Use this field to specify whether the lane numbering should reset back to 1 for the upcoming section of the road. Select Yes if the next stretch of road begins a new sequence of lane numbering, and select No if the numbering should continue from the previous section. For example, if the current road section has lanes numbered 1, 2, and 3, and the next section should start again with lane 1, choose Yes to restart numbering.
- Select whether to allow contraflow: Use this field to specify whether the lane is eligible for contraflow. Contraflow allows traffic to move in the opposite direction during specific times or situations like evacuations. If the lane is part of a reversible lane system where traffic direction changes during peak hours, or if evacuation routes are activated, choose Yes to allow contraflow.
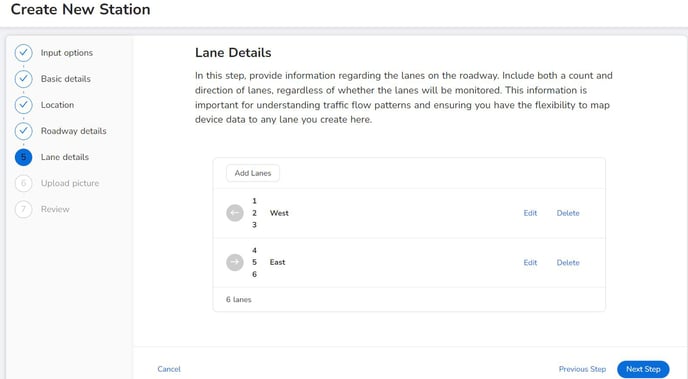
- Once configured, the lane details will be displayed. Click Next Step.
Upload Picture
Optionally upload a clear high-quality image that provides a comprehensive view of the location to improve your station documentation and display the environmental, structural, and functional characteristics. Follow these guidelines:
Image requirements
- Ensure the image is in a common format (e.g., JPEG, PNG, GIF) for optimal compatibility.
- Maximum file size: 2MB.
- Ensure the picture is clear and well-lit.
Capture guidelines
- Include key landmarks and features of the station site.
- Verify that the photo covers the entire site area.
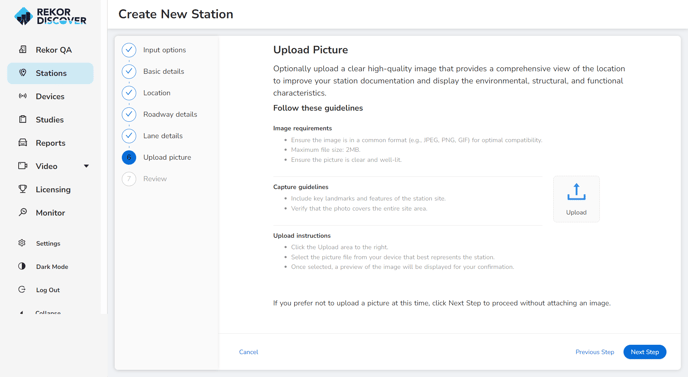
- Click the Upload area to the right.
- Select the picture file from your device that best represents the station.
- Once selected, a preview of the image will be displayed for your confirmation.
If you prefer not to upload a picture at this time, click Next Step to proceed without attaching an image.
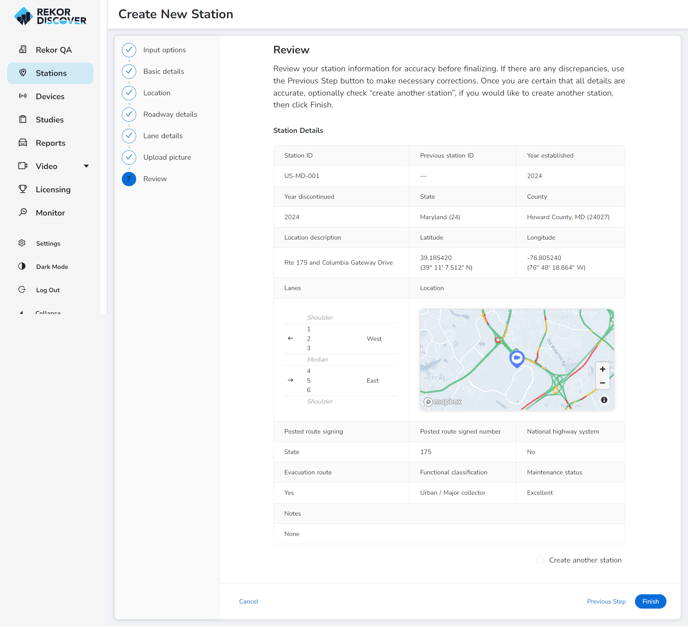
Review
Review the station information for accuracy before finalizing. If there are any discrepancies, use the Previous Step button to make necessary corrections. Once all details are accurate, click Finish.