This article provides instructions on how to create a Response Plan template.
To create a Response Plan template, a manager-level user will:
Select Settings from the drop-down menu at their user name in the upper right corner.
Scroll to the Response Plan module and click Add.

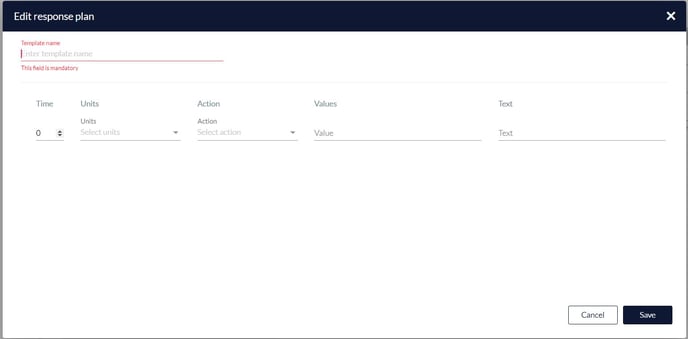
Enter the Template Name.
Select the Time (amount).
Select the units for the time from the drop-down menu. Options are:
- Days before start
- Hours before start
- Hours after start
- Hours before end
- Hours after end
Note: Once the template is uploaded, the specific time will be calculated. If 0 is entered for the time, it will be calculated as ASAP.
Select the Action from the drop-down menu. Options are:
- Change DMS
- Change traffic signal
- Open parking lots
- Open road closure
- Other
- Road closure
- Send email
- Share to public
Enter the value. For example, the intersection of the street where the incident occurred.
Enter any additional text to be displayed, if desired. Click Save.
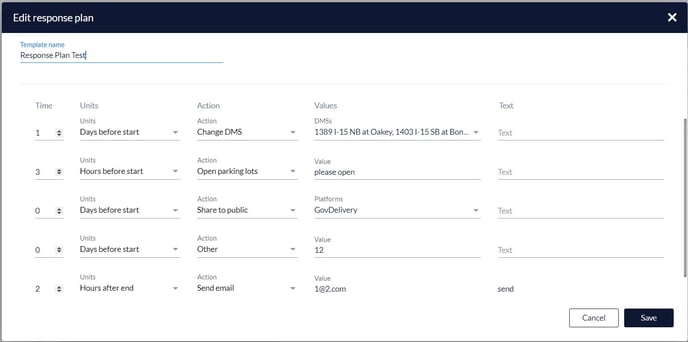
Each response plan may have multiple actions. Once an action is created, a new action may be added above or below the existing action, and the current action can be deleted by pressing the three dot menu on each line.
An example of a response plan with multiple actions is displayed below:

Once created, each response plan template may be cloned, edited, or deleted on the previous screen.